1. 내장 객체
1) String 객체
: 자바스크립트에서 문자열을 손쉽게 만들 수 있는 객체이다. 또한 문자열을 쉽게 다룰 수 있다.
const str = 'JavaScript';
const strObj = new String('JavaScript');
(str == strObj); // true
(str === strObj); // false
// 문자열의 길이는 length 프러퍼티에 저장
console.log(str.length); // 10
** String 객체 메소드
indexOf() : 특정 문자나 문자열이 처음으로 등장하는 위치를 리턴
chatAt() : 특정 문자열에서 전달 받은 인덱스에 위치한 문자를 리턴
includes() : 특정 문자열에서 전달 받은 문자열이 포함되어 있는지 여부를 리턴
substring() : 전달받은 시작 인덱스부터 종료 인덱스 바로 앞까지 문자열을 추출하여 새로운 문자열을 리턴
substr() : 전달받은 시작 인덱스부터 전달받은 개수만큼 문자열을 추출하여 새로운 문자열을 리턴
split() : 구분자를 기준으로 나눈 후 나뉜 문자열을 하나의 배열에 저장
replace() : 원본 문자열의 일부를 전달받은 문자열로 치환
trim() : 문자열의 앞뒤 공백을 제거
toUpperCase() : 영문자 중 소문자를 모두 대문자로 변환
toLowerCase() : 영문자 중 대문자를 모두 소문자로 변환
** 1_String객체.html
<!DOCTYPE html>
<html lang="ko">
<head>
    <meta charset="UTF-8">
    <meta name="viewport" content="width=device-width, initial-scale=1.0">
    <title>String 객체</title>
</head>
<body>
    <h2>String 객체</h2>
    <script>
        'use strict';
        const str1 = '안녕하세요. JavaScript';

        // length : 문자열의 길이
        // 문자열의 길이는 length 프러퍼티에 저장
        console.log(`length : ${str1.length}`);

        // indexOf() : 특정 문자나 문자열이 처음으로 등장한 위치를 리턴
        //             찾지 못했을 경우 -1 리턴
        console.log('indexOf()---------');
        console.log(str1.indexOf('j'));
        console.log(str1.indexOf('a'));
        console.log(str1.indexOf('Java'));

        // charAt() : 특정 문자열에서 전달 받은 인덱스에 위치한 문자를 리턴
        console.log('charAt()----------');
        console.log(str1.charAt(8));

        // includes() : 특정 문자열에서 전달 받은 문자열이 포함되어 있는지 여부를 리턴
        console.log('includes()--------')
        console.log(str1.includes('Java'));
        console.log(str1.includes('java'));

        // substring() : 전달받은 시작 인덱스부터 종료 인덱스 바로 앞까지 문자열을 추출하여 새로운 문자열을 리턴
        console.log('substring()-------')
        console.log(str1.substring(7));
        console.log(str1.substring(7, 11));

        // substr() : 전달받은 시작 인덱스부터 전달받은 개수만큼 문자열을 추출하여 새로운 문자열을 리턴
        console.log('substr()----------')
        console.log(str1.substr(7, 4));

        // split() : 구분자를 기준으로 나눈 후 나뉜 문자열을 하나의 배열에 저장
        console.log('split()-----------');
        const str2 = "김사과|오렌지|반하나|이메론|박수박|오피치";
        const student = str2.split("|");

        console.log(`str2 : ${str2}`);
        console.log('str2.split("|") : ' + student);

        for(let stu of student) {
            console.log(stu);
        }
        student.forEach(function(stu, idx, arr) {
            console.log(stu, idx, arr[idx]);
        });

        // replace() : 원본 문자열의 일부를 전달받은 문자열로 치환
        console.log('replace()---------')
        console.log(str1.replace('안녕하세요', 'Hello!'));

        // trim() : 문자열의 앞 뒤 공백을 제거
        console.log('trim()------------');
        const str3 = "          JavaScript          ";
        console.log(`|${str3}|`);
        console.log(`|${str3.trim()}|`);

        // toUpperCase() : 영문자 중 소문자를 모두 대문자로 변환
        console.log('toUpperCase()-----')
        console.log(str3.toLowerCase());

        // toLowerCase() : 영문자 중 대문자를 모두 소문자로 변환
        console.log('toLowerCase()-----');
        console.log(str3.toUpperCase());
    </script>
</body>
</html>
** 실행결과

2) Date 객체
: 날짜, 시간등을 쉽게 처리할 수 있는 내장 객체
** 연도(year)
① 2자리로 표현 : 1900 ~ 1999
② 4자리로 표현 : 2000 ~
** 월(month)
0(1월) ~ 11(12월)
** 시(hour)
0(시) ~ 24(시)
** 분(minute)
0(분) ~ 59(분)
** 초(seconds)
0(초) ~ 59(초)
** Date 객체 만드는 방법
① new Date() : 현재 날짜 시간을 저장한 객체가 만들어진다.
② new Date("날짜 문자열") : 해당 특정 날짜와 시간을 가리키는 객체가 만들어진다.
③ new Date(밀리초) : 1970년 1월 1일 0시 ~ 해당 밀리초만큼 지난 날짜 객체가 만들어진다(Timestamp).
④ new Date(년, 월, 일, 시, 분, 초, 밀리초) : 해당 특정 날짜 시간을 가리키는 객체가 만들어진다.
** 2_Date객체.html
<!DOCTYPE html>
<html lang="ko">
<head>
    <meta charset="UTF-8">
    <meta name="viewport" content="width=device-width, initial-scale=1.0">
    <title>Date 객체</title>
</head>
<body>
    <h2>Date 객체</h2>
    <script>
        'use strict';
        // 1) new Date() : 현재 날짜 시간을 저장한 객체가 만들어짐
        console.log(`new Date()\n${new Date()}`);

        // 2) new Date("날짜 문자열") : 해당 특정 날짜와 시간을 가리키는 객체가 만들어짐
        console.log(`new Date("2020-09-20")\n${new Date("2020-09-20")}`);
        console.log(`new Date("2020.09.20")\n${new Date("2020.09.20")}`);

        // 3) new Date(밀리초) : 1970년 1월 1일 0시 ~ 해당 밀리초만큼 지난 날짜 객체가 만들어짐(Timestamp)
        console.log(`new Date(2000000000000)\n${new Date(2000000000000)}`);

        // 4) new Date(년, 월, 일, 시, 분, 초, 밀리초) : 해당 특정 날짜 시간을 가리키는 객체가 만들어짐
        // 연도는 2자리로 표현시 1900 ~ 1999, 4자리로 표현해야 2000년대 표현 가능
        // 월(month)은 0(1월) ~ 11(12월)로 표현
        console.log(`new Date(2020, 8, 20, 10, 46, 0)\n${new Date(2020, 8, 20, 10, 49, 0)}`);
        console.log(`new Date(20, 8, 20, 10, 46, 0)\n${new Date(20, 8, 20, 10, 49, 0)}`);

        console.log('----------------------------------------------------')
        const date = new Date();
        console.log(date);
        console.log(`현재 년도 : ${date.getFullYear()}`);
        console.log(`현재 월 : ${date.getMonth() + 1}`);
        console.log(`현재 일 : ${date.getDate()}`);
    </script>
</body>
</html>
** 실행결과

2. 브라우저 객체 모델(Brower Object Model)
: 웹 브라우저에 구현된 JavaScript 객체 모델을 의미하며 window 객체의 프러퍼티로 조회할 수 있다.
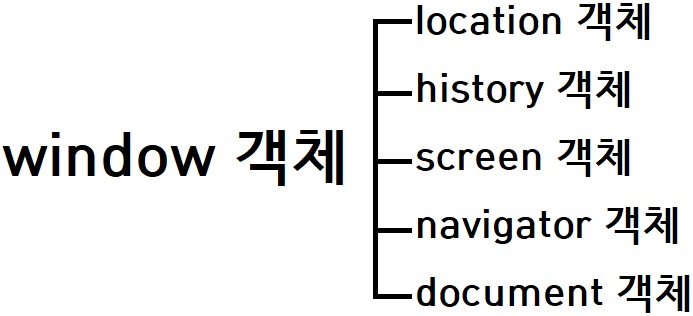
** window 객체는 브라우저 객체 중 최상위 객체이기 때문에 생략 가능
window.location.메소드() = location.메소드()
window.history.메소드() = history.메소드()
window.screen.메소드() = screen.메소드()
window.navigator.메소드() = navigator.메소드()
window.document.메소드() = document.메소드()
1) window 객체
: 현재 웹브라우저의 창이나 탭을 표현하기 위한 객체들이며,
웹 브라우저는 window 객체를 이용하여 브라우저 창을 표현할 수 있다.
모든 객체의 최상위 객체이다.
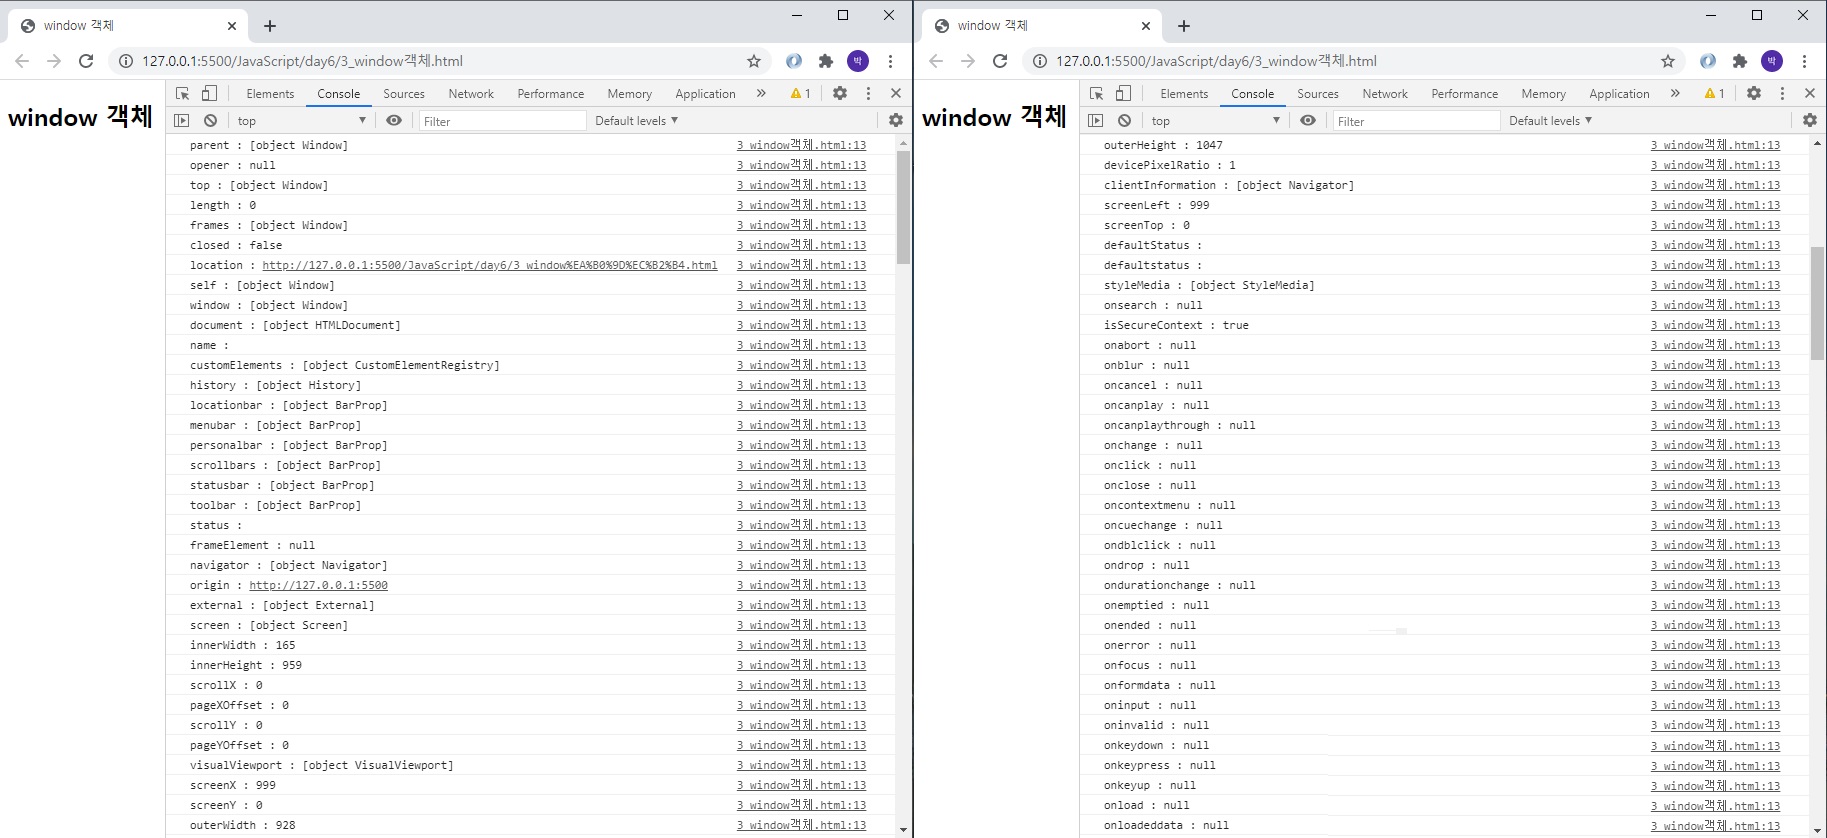
** 3_window객체.html
: window객체의 하위 객체와 window객체의 하위 메소드 볼 수 있는 예제
<!DOCTYPE html>
<html lang="ko">
<head>
    <meta charset="UTF-8">
    <meta name="viewport" content="width=device-width, initial-scale=1.0">
    <title>window 객체</title>
</head>
<body>
    <h2>window 객체</h2>
    <script>
        'use strict';
        for(let win in window) {
            console.log(`${win} : ${window[win]}`);
        }
    </script>
</body>
</html>
** 실행결과


** window 객체에서 자주 쓰이는 메소드
setTimeout() : 일정 시간이 지난 후 매개변수로 제공된 함수를 실행
[예] const 변수 = function() {
실행문;
}
const st = setTimeout(변수, 시간); // 시간 단위는 밀리초
setInterval() : 일정 시간마다 매개변수로 제공된 함수를 실행
[예] const 변수 = function() {
실행문;
}
const si = setInterval(변수, 시간); // 시간 단위는 밀리초
clearTimeout() : 일정 시간 후 setTimeout()에서 실행된 함수를 중지
[예] clearTimeout(setTimeout_객체명);
clearInterval() : 일정 시간마다 setInterval()에서 실행된 함수를 중지
[예] clearInterval(setInterval_객체명);
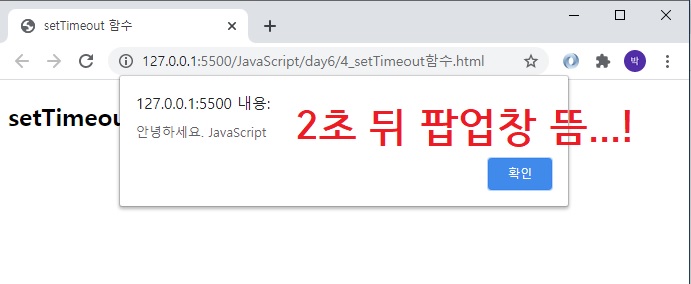
** 4_setTimeout 함수.html
<!DOCTYPE html>
<html lang="ko">
<head>
    <meta charset="UTF-8">
    <meta name="viewport" content="width=device-width, initial-scale=1.0">
    <title>setTimeout 함수</title>
</head>
<body>
    <h2>setTimeout 함수</h2>
    <script>
        'use strict';
        // setTimeout() : 일정 시간이 지난 후 매개변수로 제공된 함수를 실행
        const st = window.setTimeout(Hi, 2000);

        function Hi(){
            alert("안녕하세요. JavaScript");
        }

        // clearTimeout() :  일정 시간 후 setTimeout()에서 실행된 함수를 중지
        //clearTimeout(st);
    </script>
</body>
</html>
** 실행결과
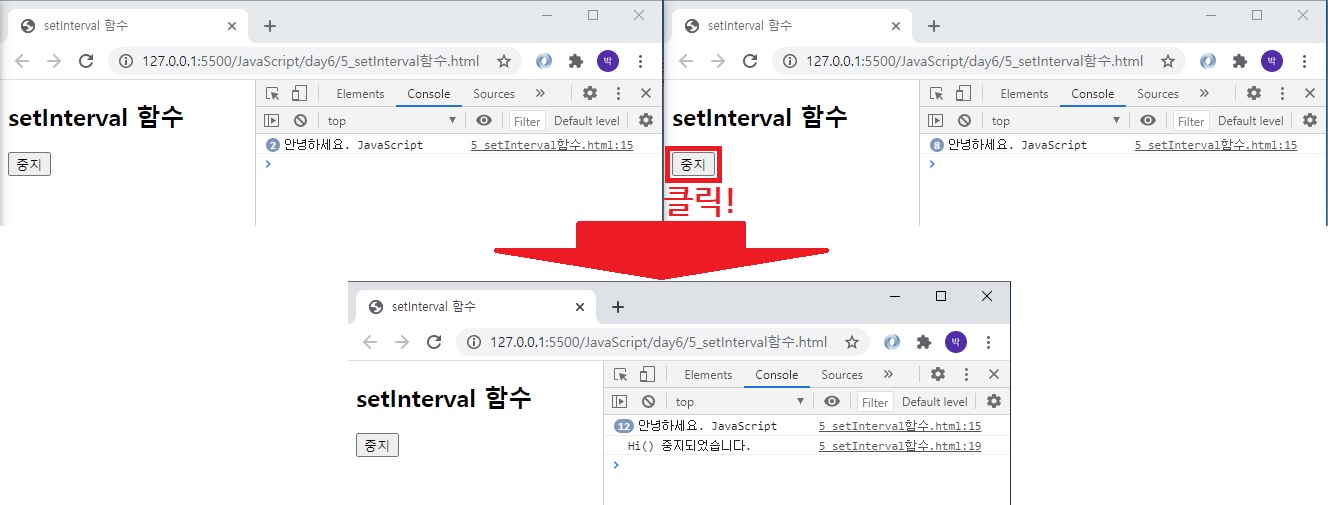
** 5_setInterval함수.html
<!DOCTYPE html>
<html lang="ko">
<head>
    <meta charset="UTF-8">
    <meta name="viewport" content="width=device-width, initial-scale=1.0">
    <title>setInterval 함수</title>
</head>
<body>
    <h2>setInterval 함수</h2>
    <script>
        'use strict';
        const si = setInterval(Hi, 2000);

        function Hi(){
            console.log('안녕하세요. JavaScript');
        }

        function clearInterv() {
            console.log("Hi() 중지되었습니다.");
            clearInterval(si);
        }
    </script>
    <button onclick="clearInterv()">중지</button>
</body>
</html>
** 실행결과
2) location 객체
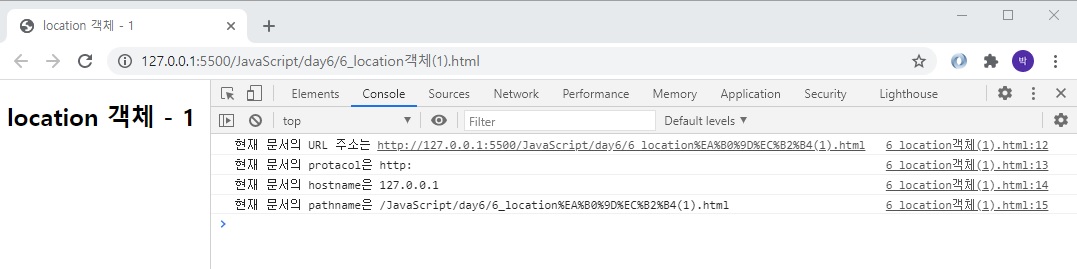
: 현재 브라우저에 표시된 HTML 문서의 주소를 얻거나, 브라우저에 새 문서를 불러올 때 사용한다.
href : 페이지의 URL 전체 정보를 반환한다. URL을 지정하여 페이지를 이동할 수 있다.
protocol : 콜론을 포함하는 http, https, ftp등 프로토콜 정보를 반환한다.
hostname : 호스트의 이름과 포트번호를 반환한다.
pathname : URL 경로 부분의 정보를 반환한다.

** 6_location객체(1).html
<!DOCTYPE html>
<html lang="ko">
<head>
    <meta charset="UTF-8">
    <meta name="viewport" content="width=device-width, initial-scale=1.0">
    <title>location 객체 - 1</title>
</head>
<body>
    <h2>location 객체 - 1</h2>
    <script>
        'use strict';
        console.log(`현재 문서의 URL 주소는 ${location.href}`);
        console.log(`현재 문서의 protacol은 ${location.protocol}`);
        console.log(`현재 문서의 hostname은 ${location.hostname}`);
        console.log(`현재 문서의 pathname은 ${location.pathname}`);
    </script>
</body>
</html>
** 실행결과
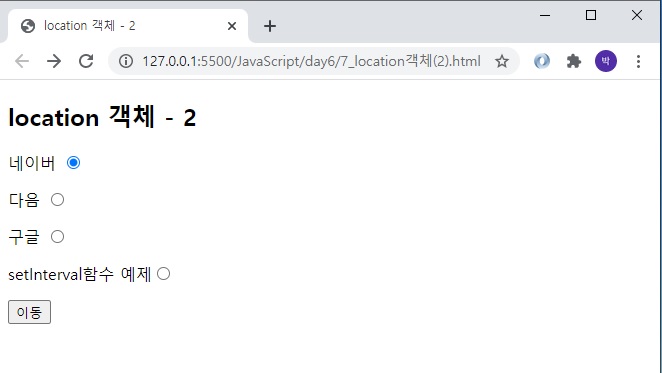
** 7_location객체(2).html
<!DOCTYPE html>
<html lang="ko">
<head>
    <meta charset="UTF-8">
    <meta name="viewport" content="width=device-width, initial-scale=1.0">
    <title>location 객체 - 2</title>
</head>
<body>
    <h2>location 객체 - 2</h2>
    <form name="myform">
        <p><label>네이버 <input type="radio" value="naver" name="site" checked></label></p>
        <p><label>다음 <input type="radio" value="daum" name="site"></label></p>
        <p><label>구글 <input type="radio" value="google" name="site"></label></p>
        <p><label>setInterval함수 예제<input type="radio" value="page" name="site"></label></p>
        <p><input type="button" value="이동" onclick="sendit()"></p>
    </form>
    <script>
        'use strict';
        function sendit() {
            const frm = document.myform;
            if(frm.site.value == 'naver') {
                location.href = 'https://www.naver.com';
            } else if(frm.site.value == 'daum') {
                location.href = 'https://www.daum.net';
            } else if(frm.site.value == 'google') {
                location.href = 'http://www.google.net';
            } else {
                location.href = '5_setInterval함수.html';
            }
        }
    </script>
</body>
</html>
** 실행결과
3) history 객체
: 브라우저의 히스토리 정보를 문서와 문서 상태 목록으로 저장하는 객체이다.
자바스크립트는 사용자의 개인 정보를 보호하기 위해 이 객체의 접근하는 방법을 일부 제한하고 있다.
** history 객체에서 자주 쓰이는 메소드
back() : 브라우저에서 뒤로 버튼을 누른 효과를 낸다.
go() : 매개변수로 전달된 숫자만큼 히스토리에 적용된 페이지로 이동한다(0 또는 음수).
forward() : 브라우저에서 앞으로 버튼을 누른 효과를 낸다.
** 8_history객체.html
<!DOCTYPE html>
<html lang="ko">
<head>
    <meta charset="UTF-8">
    <meta name="viewport" content="width=device-width, initial-scale=1.0">
    <title>history 객체</title>
</head>
<body>
    <h2>history 객체</h2>
    <button onclick="goBack()">뒤로</button>
    <button onclick="go()">뒤로 2페이지 이동</button>
    <button onclick="goForward()">앞으로</button>
    <button onclick="goReload()">새로고침</button>
    <script>
        'use strict';
        function goBack() {
            history.back();
        }
        function go() {
            history.back(-2);
        }
        function goForward() {
            history.forward();
        }
        function goReload() {
            //history.go(0);
            location.reload();
        }
    </script>
</body>
</html>
** 실행결과

4) screen 객체
: 장치의 디스플레이 정보를 담고 있는 객체이다.
해당 객체는 현재 거의 사용되지 않는다.
요즘은 screen 객체가 하던 일을 CSS media queries가 해주고 있기 때문이다.
screen 객체와 CSS media queries가 똑같은 일을 하고 있는 것은 아니지만
과거에는 지금처럼 핸드폰과 테블릿이 활성화가 된 지 얼마 안됬었다는 것을 생각하면 이해하기 쉽다.
과거에는 데스크탑이 최소 15인지 ~ 최대 20인지 시절
해당 객체를 통해 해상도를 파악하여 웹사이트의 가로 스크롤이 보이지 않도록 크기 조절하기 위해 사용했다.
요즘은 해당 객체를 이용하기보다는
CSS media queries를 이용하여 컴퓨터와 테블릿, 휴대전화의 각기 다른 크기에 대한 반응형 구현한다.
5) navigator 객체
: 브라우저 공급자 및 버전 정보 등을 포함한 브라우저에 대한 정보를 저장하는 객체이다.
해당 객체는 현재 거의 사용되지 않는다.
과거에는 이 객체를 이용하여 사용자가 사용하는 OS와 브라우저, 그리고 버전을 파악하는 용도로 사용했다.
그 이유는 JavaScript가 표준화되기 전에는 브라우저마다 규칙과 문법이 달랐다.
그렇기 때문에
navigator 객체를 이용하여 사용자가 사용하고 있는 OS와 브라우저, 버전에 맞는 화면을 보여주기 위해 사용했다.
지금은 JavaScript가 표준화됬기 때문에 해당 정보들이 필요 없게 되었고
개인정보 중요성 때문에 정확한 정보 파악이 어려워졌다.
그로인해 navigator 객체는 거의 사용하고 있지 않지만
해당 navigator 객체에 geolocation 객체가 추가됨에 따라 geolocation 객체는 많이 사용되고 있다.
** geolocation 객체?
지리위치 API, 사용자의 위치 정보를 확인할 수 있다.
** 9_navigator객체.html
<!DOCTYPE html>
<html lang="ko">
<head>
    <meta charset="UTF-8">
    <meta name="viewport" content="width=device-width, initial-scale=1.0">
    <title>navigator 객체</title>
</head>
<body>
    <h2>navigator 객체</h2>
    <script>
        'use strict';
        navigator.geolocation.getCurrentPosition(success, fail);

        function success(location) {
            console.log(location.coords.latitude);	// 위도
            console.log(location.coords.longitude);	// 경도
        }
        function fail(msg) {
            console.log(msg.code);
        }
    </script>
</body>
</html>
** 실행결과


6) document 객체
: 매우 중요한 객체이기 때문에 추후 심도있게 배울 예정
'웹_프론트_백엔드 > 프론트엔드' 카테고리의 다른 글
| 2020.09.26 (0) | 2020.09.28 |
|---|---|
| 과제-주민등록번호 검증 페이지 작성 (0) | 2020.09.25 |
| 2020.09.19 (0) | 2020.09.22 |
| 보강(2020.09.12, 2020.09.13) (0) | 2020.09.12 |
| 2020.08.30 (0) | 2020.08.30 |